sexta-feira, 27 de dezembro de 2013

Sonhos


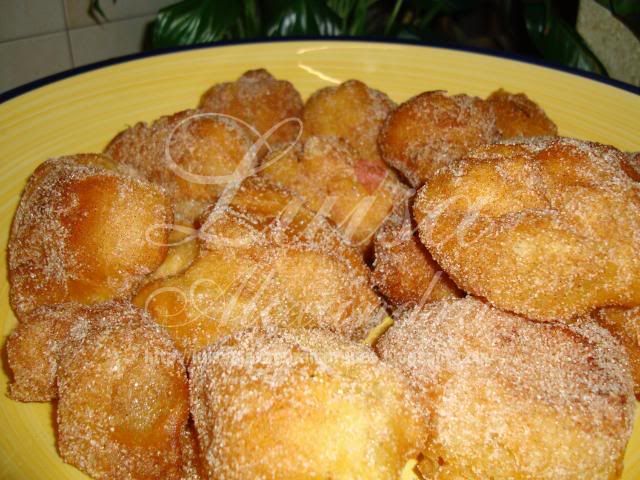
Sonhos, a típica receita de Natal, da Paula - mais uma :). Há várias versões: de abóbora, de cenoura, etc. Estes são os melhores: os simples.


Ingredientes

· 500 ml de água
· a mesma medida de farinha (não são 0,5 L nem 0,5 kg - é a mesma medida que ocupou a água)
· 100 g de manteiga (estilo Vaqueiro)
· 1 pitada de sal
· 6 ovos


Elaboração

Num tacho juntar a água, a mateiga e o sal. Quando levantar fervura, retirar só para juntar a farinha e voltar pôr-se ao lume. Mexer até que a massa se descole.
Depois de descolar, tirar do lume e juntar os ovos 1 a 1.
Bater até ter uma massa de consistência homogénea.
aquecer óleo a 180ºC., fazer colheradas e pôr a fritar. Elas vão inchar o óleo.
Escorrer, pasar por açúcar e canela. Et voilà! 

_____________________________________________

(Original: http://www.luisaalexandra.com/2008/12/sonhos.html)
Outra versão, para me servir de apoio.


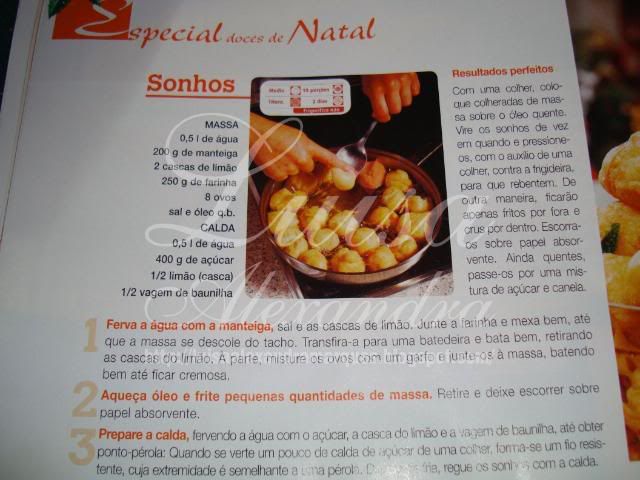
Receita retirada da Revista "Segredos de Cozinha" - Especial Doces Tradicionais de Natal 2008


Fizémos metade da receita.

Ingredientes:
| 0,5 l. de Água
| 200 gr. de Margarina
| 2 Cascas de Limão
| 250 gr. de Farinha
| 8 Ovos
| Sal e Óleo q.b.

Preparação:
No copo da bimby colocar a água, margarina, as cascas de limão e o sal.
Programar 7 min., temp. 100, vel. colher inversa.
Retire as cascas de limão.
Adicione a farinha e misture 2 min., vel. 5.
A massa deve descolar do copo.
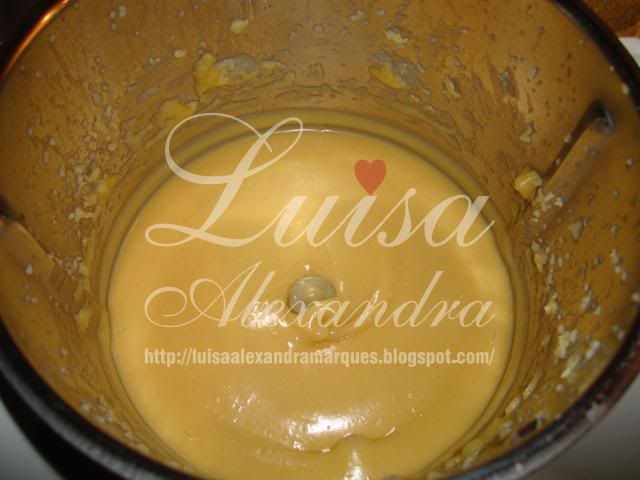
Deixe arrefecer a massa durante uns minutos e depois coloque a máquina a trabalhar na vel. 3 e vá adicionando os ovos um a um pelo bucal, aumentando para a vel. 5 durante 2 minutos.
Obterá uma massa muito cremosa.


Aqueça óleo e frite pequenas quantidades de massa. A massa alastra imenso ao fritar, pelo que rende muito.
Com uma faca, ou um garfo, ir picando os sonhos para que cozinhem bem por dentro.


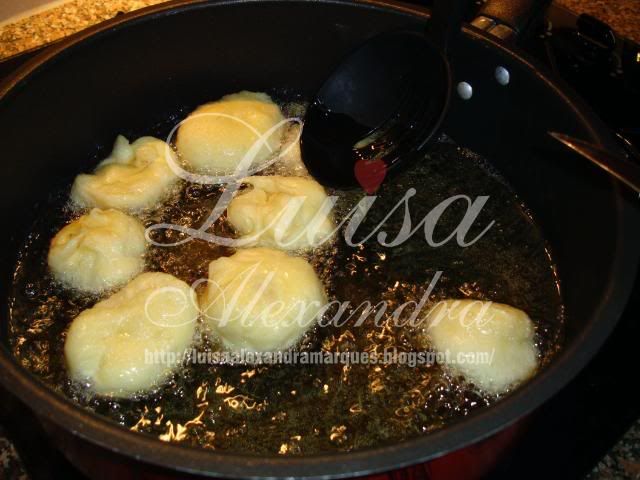
Nesta foto vê-se que até saem fora da fritadeira:


Depois de fritos deixe escorrer sobre papel absorvente para retirar o excesso de óleo.
Polvilhe generosamente com uma mistura de açúcar, canela e raspa de limão.
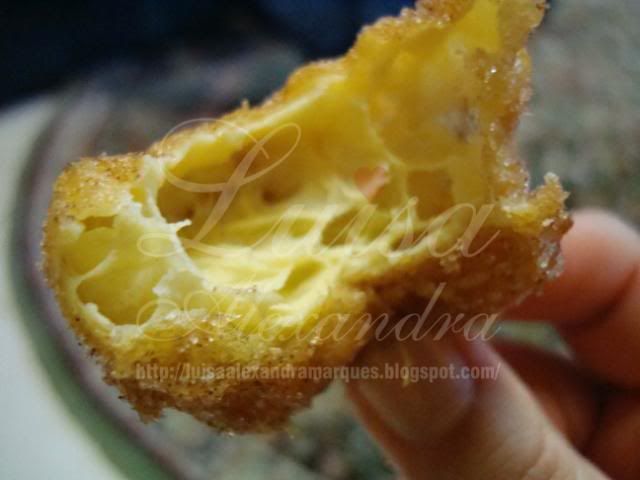
O interior:


quinta-feira, 19 de dezembro de 2013

Peanut Butter Truffle Mousse Cheesecake

(Original: http://www.inkatrinaskitchen.com/2011/07/peanut-butter-truffle-mousse-cheesecake.html)


Peanut Butter Truffle Mousse Cheesecake #recipe from @KatrinasKitchen

I apologize to you in advance for this madness. But I do have a good excuse – last week my husband and I celebrated our 10 year wedding anniversary! So he gave me a gorgeous ring and I gave him…a gorgeous cake (don’t you think?). But I couldn’t stop with peanut butter truffle mousse cheesecake. I mean, this is a once in a lifetime celebration, right?
Peanut Butter Truffle Mousse Cheesecake #recipe from @KatrinasKitchen

Once in a lifetime, People!
Let’s break this down, shall we?
Peanut Butter Truffle Mousse Cheesecake #recipe from @KatrinasKitchen

6K+

This fluffy and full cheesecake is resting on a chocolate peanut butter Oreo crust, topped off with a thick layer of peanut butter truffle mousse and Reese’s Cups. Then…well, then I felt the need to drizzle it with warm peanut butter sauce.
Peanut Butter Truffle Mousse Cheesecake #recipe from @KatrinasKitchen

So I made my husband’s favorite dinner and then surprised him with this beauty. I ran out of time to make him a card though – that’s okay isn’t it? If you’ll excuse my ramblings for a minute let me just tell you how happy I am to be married to my best friend! We are high school sweethearts and had dated 6 years before we graduated college and got married. He still makes my heart go all aflutter and I am full to bursting with love for him. We laugh every day and truly enjoy one another’s company. Believe me when I say I count my blessings every day.
Peanut Butter Truffle Mousse Cheesecake #recipe from @KatrinasKitchen

Happy anniversary, Husband!
I love you.
More than peanut butter.
Peanut Butter Truffle Mousse Cheesecake #recipe from @KatrinasKitchen

Peanut Butter Truffle Mousse Cheesecake Recipe


Fluffy cheesecake topped with a peanut butter mousse layer and drizzled in warm peanut butter sauce

INGREDIENTS:

Crust:
  • 2 cups crushed peanut butter Oreos (approx. half a pack)
  • ¼ cup butter, melted
Cheesecake:
  • 4 (8oz) sticks of cream cheese, room temperature
  • 1 ¼ cup granulated sugar
  • 4 eggs
  • 3/4 cup heavy cream
  • 1 tablespoon vanilla extract
Peanut Butter Truffle Mousse
  • 8 oz cream cheese, room temperature
  • 2/3 cup peanut butter
  • 1 tablespoon milk
  • 2 cups powdered sugar
  • 2 tubs (or 1 large tub) Cool Whip
  • Reese’s Cups (optional)

DIRECTIONS:

Crust:
  1. Preheat oven to 350 degrees F. Wrap a 9 inch springform pan in heavy duty foil.
  2. Mix together crushed Oreos and melted butter and press into the bottom of your pan and up the sides. Bake for 7 minutes and cool on a wire rack.
Cheesecake:
  1. Boil a large pot of water for the water bath.
  2. In the bowl of your mixer fitted with the paddle attachment, combine the sugar and cream cheese and cream together until smooth. Add eggs, one at a time making sure to scrape down the bowl in between each egg. Add heavy cream and vanilla and mix until creamy and smooth.
  3. Pour batter into prepared crust. Place pan into a larger pan and pour boiling water into the larger pan until halfway up the side of the cheesecake pan.
  4. Bake 45 to 55 minutes until the edges appear to be set. The center will still have some jiggle to it. Close the oven door, turn the heat off, and let rest in the cooling oven for 1 hour.
  5. After 1 hour has passed, remove the cheesecake from the water bath and place on a cooling rack to cool completely. Once the cake is completely cooled, chill for at least 5 hours (overnight is better).
The next morning assemble the PB Truffle Mousse:
  1. In the bowl of your mixer combine cream cheese, peanut butter and milk until smooth.
  2. Slowly beat in powdered sugar then fold in the Cool Whip.
  3. Spoon over the cheesecake then chill at least 3 hours. Garnish with peanut butter cups.

NOTES:

  • The warm peanut butter glaze has already made an appearance on my blog. The only change I made was to bump up the peanut butter to 1 cup in order to make it a thicker consistency.

Peanut Butter Truffle Mousse Cheesecake #recipe from @KatrinasKitchen

If you are scared of baking a cheesecake watch this vlog from My Baking Addiction. I used Jaime’s cheesecake recipe as a base for this creation. The video was very helpful and reassuring especially since I knew I wanted a fluffy and full cheesecake. Thanks also to Cassie from Bake Your Day for directing me to Jaime’s site when I turned to my Twitter friends for cheesecake help!

Cookie Dough Brownie Bombs Recipe


browniecookie


The idea for these truffles came from left field. I had a bunch of St. Patty’s Day recipes I wanted to make this weekend, and out of nowhere, a huge zeppelin of awesome floated into my brain and interrupted whatever I was doing at the present moment, which probably wasn’t important since I’m either reading trashy magazines or judging customers at work for ordering mayo and lettuce on hot sandwiches (it’s a NO, people–hot mayo? wilted lettuce? You need an intervention).

DSC_0462ADSC_0458A
And this zeppelin dropped a gigantic bomb of brilliance on me: wrap a brownie around a ball of cookie dough. Then coat said ball in chocolate. And voila, this cataclysmic invention was created. You’ll never enjoy brownies or cookie dough respectively, again. This is the ultimate.
Now pardon me, but I have some reading/judging to do and it’s VERY important.
Prep time:  


Cook time:  


Total time:  
Serves: 15-18
 
Ingredients
  • ¾ cup butter, softened
  • ¾ cup brown sugar
  • ¼ cup white sugar
  • 2 Tbsp milk
  • 1 tsp vanilla extract
  • 2 cups all-purpose flour
  • Pinch salt
  • 2 cups miniature chocolate chips, divided
  • 1 pkg fudge brownie mix, baked and cooled
  • 1 pkg Candiquik or chocolate almond bark
Instructions
  1. Let’s make some dough! In the bowl of a stand mixer, beat together the butter and sugars until creamy. Add the milk and vanilla; beat to combine. Lastly, beat in the flour and pinch of salt until a soft dough forms. Stir in ONE (1) cup of the mini chips.
  2. On a foil-lined baking sheet, drop rounded, (scant) Tablespoon-sized balls of dough. I used a cookie dough scoop for this and just scantily filled it so the cookie dough balls wouldn’t be so big. Freeze the cookie dough balls for about an hour to firm up.
  3. Cut the brownies into small squares, about 1″ in size. Pick up a square and gently flatten it with your palm. Fudgy brownies will flatten easily and retain their moisture which is why it’s important to make sure you use a fudgy brownie mix rather than a cake-y one.
  4. Place a cookie dough ball in the middle of the flattened brownie and very gently, wrap the brownie around the cookie dough ball. If the brownie cracks, that’s okay; just kind of roll it in your fingers until the brownie completely surrounds the cookie dough. Repeat until all cookie dough balls are covered, then return to the freezer for 30 minutes or so.
  5. Prepare chocolate bark according to package directions. Using a fork, dip each brownie truffle into the chocolate, coat completely, and allow excess to drip off. Return to the foil-line sheet and sprinkle the tops with the remaining cup of mini chips, for garnish. Store these bad boys in the fridge or freezer, in an airtight container.
  6. **Note: You may have extra balls of cookie dough leftover. May I suggest making cinnamon rolls or stuffed Oreos? Or, uh, eat them? Why am I telling you what to do with cookie dough?**


DSC_0468A
Talk about the ultimate indulgence. Sometimes, the decision between fudgy, gooey brownies or chewy, buttery chocolate chip cookies is one I’m not willing to make. It’s not fair to either rejected party when I both want them so equally, and love them both so much. So I fixed the problem with a decadent chocolate/cookie dough bomb that melts in your mouth and tastes AWESOME. The cookie dough remains soft and gooey, while the chewy brownie provides the perfect blanket of rich chocolate. In other words, they’ll change yo life.
Have a great day!!

The Perfect Sugar Cookie Recipe

(Original: http://www.inkatrinaskitchen.com/2011/12/best-sugar-cookie-recipe-and-kitchenaid_28.html)


I have been using this recipe for over 10 years and it has never failed me. The texture is medium-soft but you can bake them longer if you prefer a crisp cookie. This Basic Sugar Cookie Dough recipe is my absolute favorite because:
It comes together quickly.
It does NOT need to be chilled.
It can be doubled, halved, etc easily.
It holds its shape with very little expanding when baked.
The recipe I am giving you makes a large batch of dough because I like to bake a lot of cookies. Also I like to roll and cut my cookies fairly thick…to hold a lot of frosting. Please feel free to halve it. Please note: Incorporating the last cup of flour may make you nervous. It will be dry and look crumbly. Turn out the dough and work with wet hands until the dough is smooth and ready to roll.
BEST Sugar Cookie Dough Perfect Edges Every Time inkatrinaskitchen.com from @katrinaskitchen


Best Sugar Cookie Recipe

PrintPRINT  SaveSAVE
YIELD: 3 dozen large cookies
PREP TIME: 30 minutes
COOK TIME: 6-8 minutes
TOTAL TIME: 38 minutes
Soft cut out sugar cookie recipe that keeps its shape and dough does not need to be chilled before baking- perfect edges every time!

INGREDIENTS:

  • 2 cups of butter, softened (1 cup = 226 g)
  • 2 cups (402 g) of granulated white sugar (1 cup = 201 g)
  • 2 teaspoons of vanilla extract
  • 1 teaspoon of almond extract
  • 2 eggs
  • 4 teaspoons baking powder
  • 6 cups (768 g) all purpose flour (1 cup = 128 g)

DIRECTIONS:9

  1. Preheat oven to 350° F. ( +/-180º C)
  2. In the bowl of your mixer cream butter and sugar until smooth.
  3. Beat in extracts and eggs.
  4. In a separate bowl combine baking powder with flour and add a little at a time to the wet ingredients. The dough will be very stiff. If it becomes too stiff for your mixer turn out the dough onto a countertop surface. Wet your hands and finish off kneading the dough by hand.
  5. DO NOT CHILL THE DOUGH. Divide into workable batches, roll out onto a floured surface and cut. You want these cookies to be on the thicker side (closer to 1/4 inch rather than 1/8).
  6. Bake at 350 for 6-8 minutes. Let cool on the cookie sheet until firm enough to transfer to a cooling rack.

NOTES:

  • If you must chill the dough just leave it on the countertop for 10 minutes before rolling or work the dough with your hands for a few minutes.
  • I hesitate to put a recipe yield on cut out cookie recipes because the yield varies with the size of cookie cutters being used. This recipe makes a LARGE amount of dough. It can easily be halved to meet your needs.
  • You can omit the almond extract if you do not have it available, however the taste is really fantastic with the hint of almond.
Original recipe and images © In Katrina's Kitchen 
Click here for my favorite buttercream frosting recipe (use all crisco if you would like it to crust, all butter for frosting that stays soft).
Click here for my Small Batch Royal Icing recipe (it dries hard, and is perfect for holding together gingerbread houses too!).